
Metagolf comes with a built-in Level Editor allowing you to create, share and download new courses.
Any graphics, sounds, musics, particle effects and physical behavior can be customized through its simple interface.
You can access the level editor in-game by pressing the F8 key on your keyboard.

* Note: the saving functionality is only available under the Full Registered version.
![]()
Game Engine and Level Editor presentation
![]()
Special cases and various examples
Let’s say we want to change the main character graphics. Like most scripted game objects you need to follow certain rules. In the following example I will only talk about the main player graphics. Other special cases and templates will be discussed later.
Firstly the caracter sprite cell is used to create 2 in-game hit box:

-
The Character Sprite: Can be any size you want but remember that if you made it smaller or larger the physical mass will change accordingly (the player will move faster or slower, jump higher or lower, slide more or less, etc.).
By default the main character sprite cell is 82×82 pixels. -
The GolfBall Hitbox: Is used in game to detect when a player touch a Golf Ball or any objects he can shoot with his club (crates, rabbits, other players,etc.).
Its size is equal to a full Character Sprite cell (so by default 82×82 pixels too). -
The Collision Hitbox: Is used in game to simulate full collision with the environment. This is the “real” hit box of our player.
Its width is 30% and its height is 80% of the GolfBall Hitbox.
Secondly the character sprite sheet is divided into 30 frames in the following manner:
![]()
Finally to load and setup your own character sprite follow these simple step:
- Step 1: Open the Skin Panel thanks to the shortcut button of the Toolbar Panel.

- Step 2: Add a new skin inside the Skin Editor.

- Step 3: Select your character sprite sheet thanks to the File Selector (try to keep your files inside your level folder for portability).

- Step 4: Setup your skin correctly. Don’t forget that we are using the size of a cell frame rather than the full image size. Here I choose a sprite of 64×64 pixels.

- Final Step : Apply your skin to the Player Object via the Object Inspector.
Note that you will have to provide as many player skin as available in the player selection menu (currently there is 4 different skins, one for each player).

![]()
Official Template Files
The following Zip archive contains all the graphic assets and template files of the game.
You can use them to help you to design your own Skins.
Warning: the following graphic resources are copyrighted and for personal use only – All rights reserved © Arm42.com
- The Official Metagolf Template Files v0.7.450.
The Level Paper Template.
Most of the time when I design a new level I first draw a quick sketch and then if the map require more precision I’m using this Paper Template and a pencil before rushing in the Level Editor.
It may save you a precious time so I share my template with you.
On the top left corner you will see this little caption :
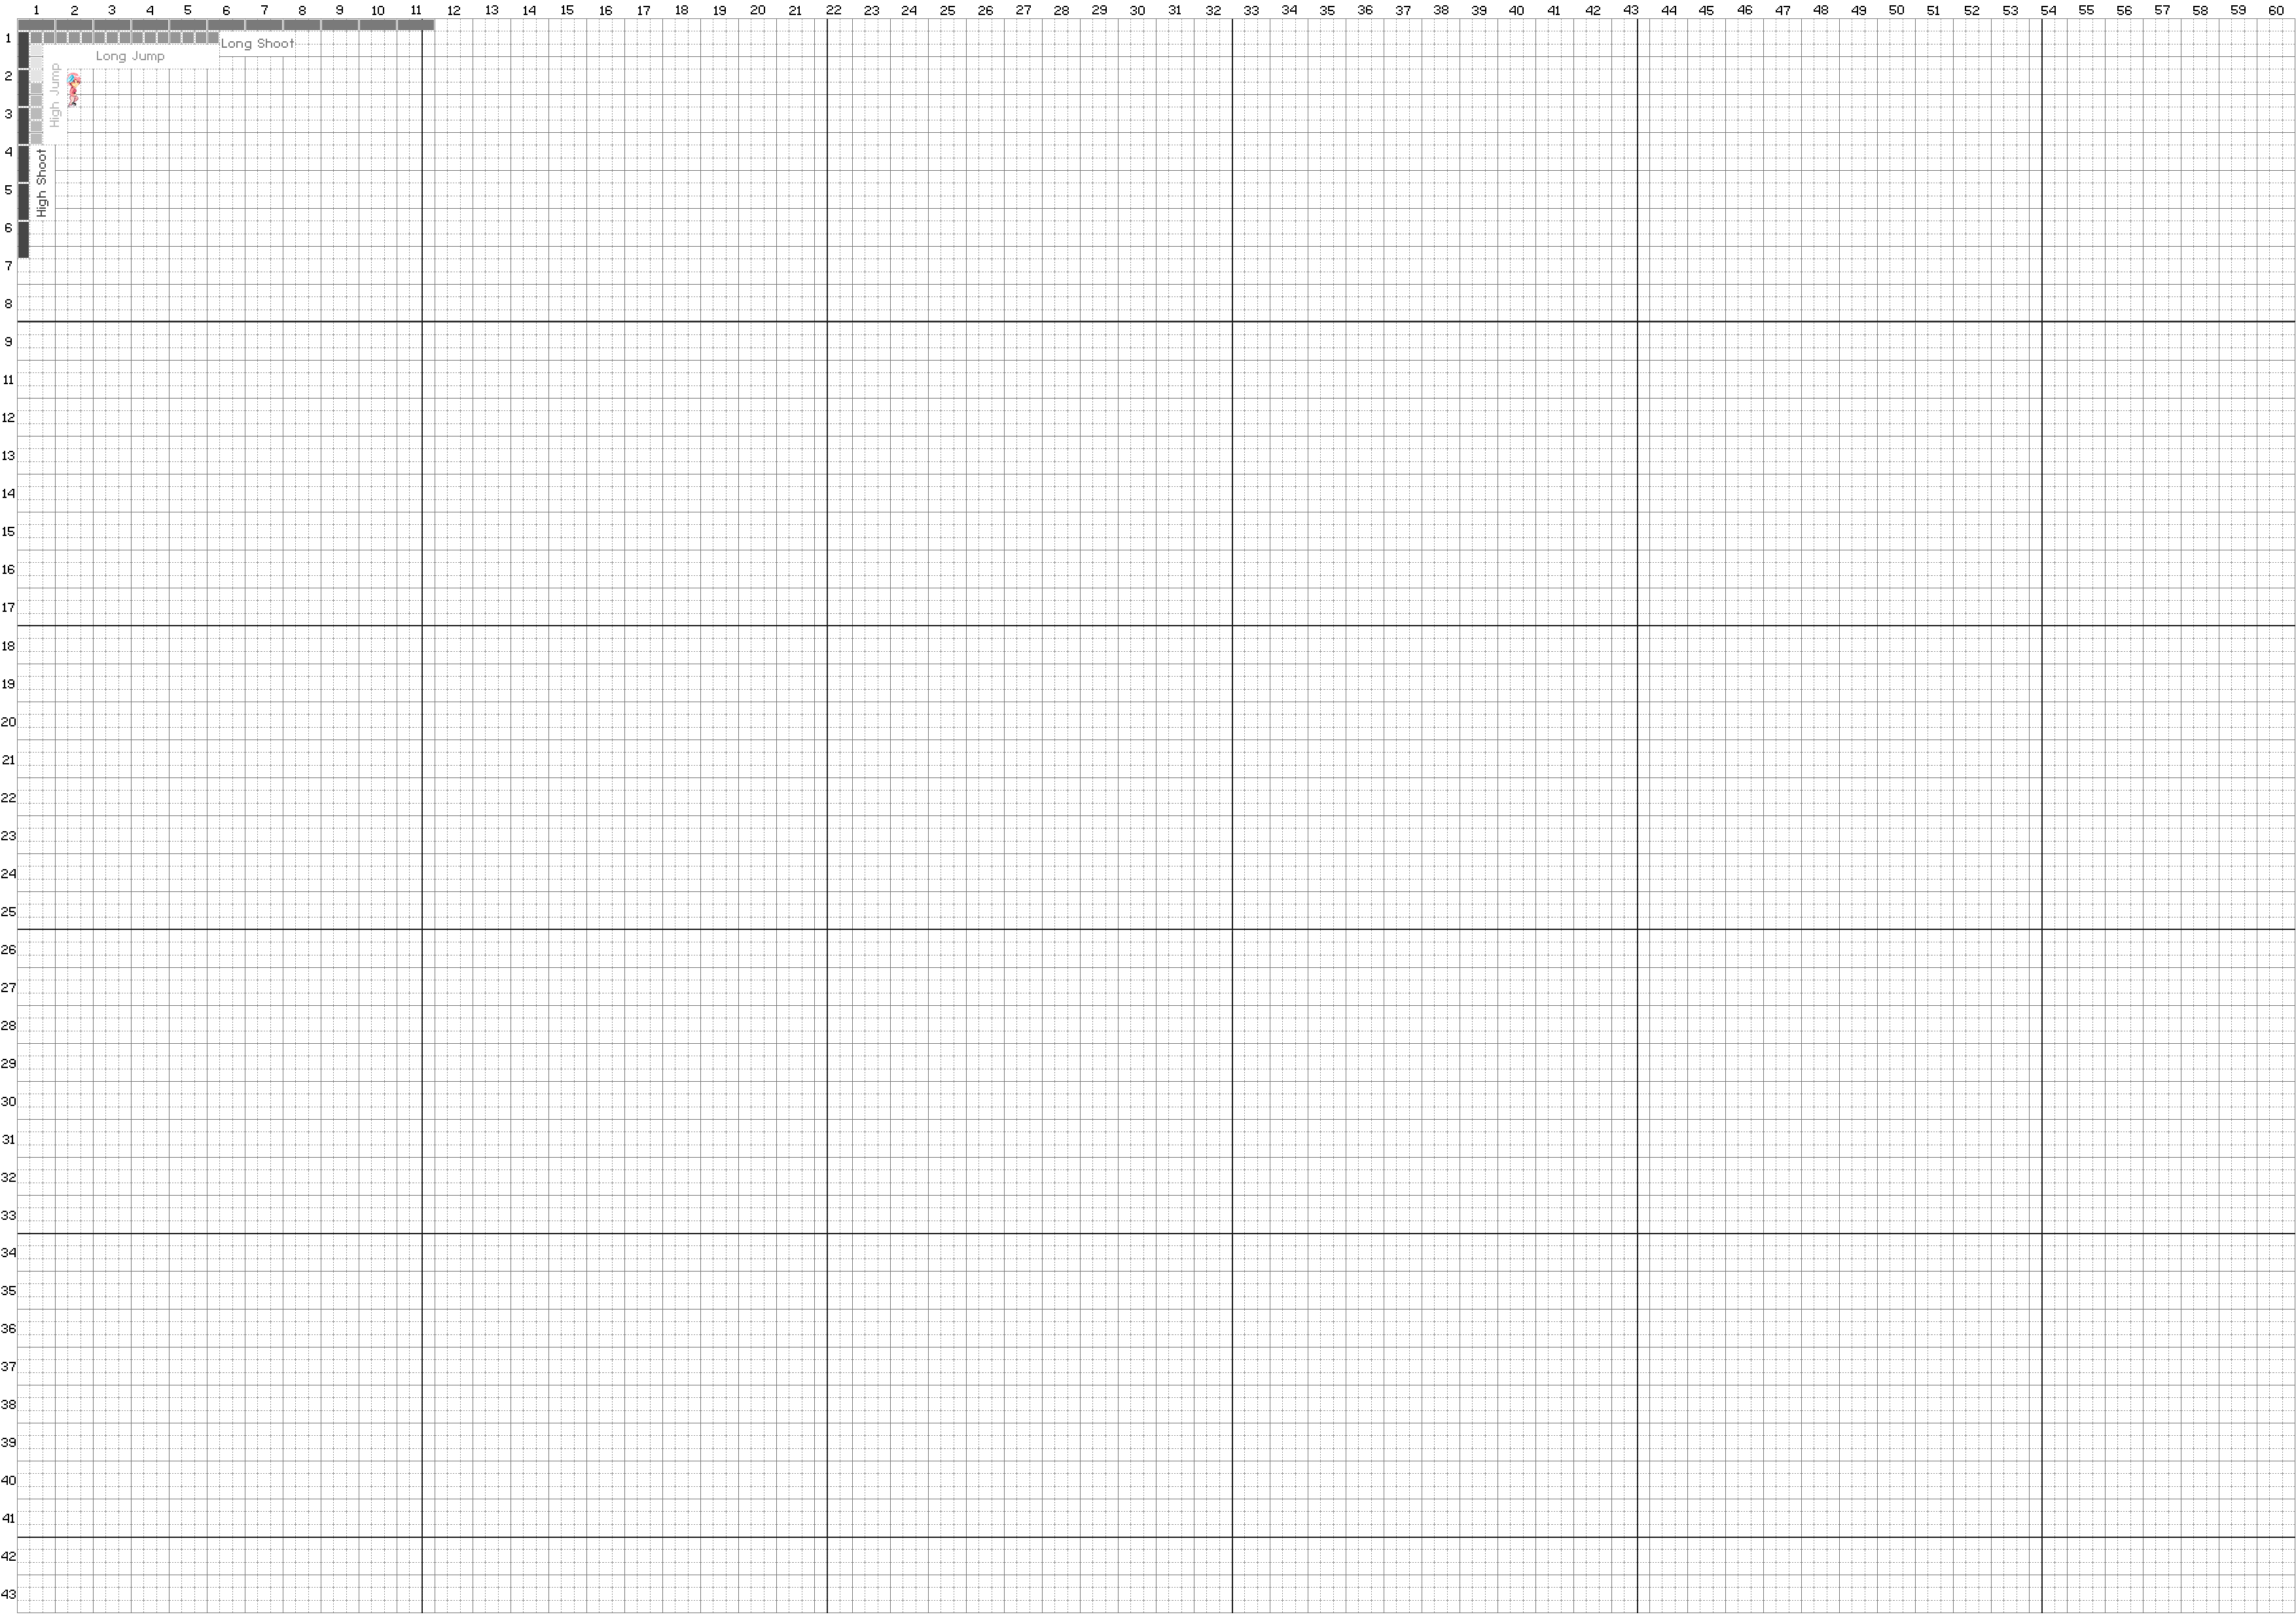
It’s actually a scale using default values of Metagolf.
- A square represent a 32×32 pixel tiles.
- The 3×3 squares represent the editor grid.
- The bold rectangles represent one screen.
- The player is represented as well as default jump and shoot distances.
- Five squares is the maximum platform height a player can reach while jumping.
- Eight squares is the maximum height a player can touch while jumping.
Hope this will give you a more clear idea of the scale ![]()
![]()
Further information
While inside Metagolf, press the F12 key at any time to popup the Help Panel.
Or if you prefer, you can download the Help content through these links :
- English version: Help Manual v0.4.345
- Version Française: Manuel d’aide v0.4.345
- feel free to correct my poor english if needed
